






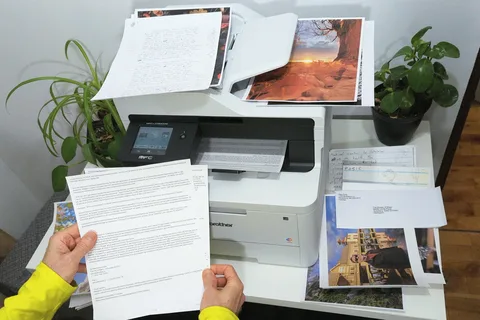
In most cases, scanning from a Brother printer to computer is simple once you understand the process. Brother multifunction printers are designed to handle printing, copying, and scanning efficiently. The scanning feature allows you to convert physical documents into digital files within minutes.
Before you begin, make sure your printer is properly connected to your computer using USB or WiFi. Also, confirm that the correct Brother drivers and scanning software are installed. This ensures smooth communication between your devices and avoids errors during scanning.
Preparing Your Device Before Scanning
Proper setup is the key to successful scanning. First, turn on your Brother printer and computer. Then place your document correctly on the scanner glass or in the automatic document feeder if your model supports it.
Next, check your connection. If you are using USB, ensure the cable is securely plugged in. If you are using WiFi, confirm both devices are connected to the same network. This step is very important because mismatched networks often cause scanning failures.
Scanning Using USB Connection
A USB connection is one of the most stable ways to scan documents. Start by opening the Brother scanning software such as Brother i Print & Scan or Control Center on your computer. Select the scan option from the interface. Then choose your preferred format like PDF, image, or email scan. Click the scan button, and the printer will immediately start scanning your document.
Once completed, save the file in your desired location. This method is ideal for users who prefer a direct and reliable connection.
Wireless Scanning via WiFi
Wireless scanning offers more flexibility and comfort. First, ensure both your printer and computer are connected to the same WiFi network. Without this, the scanner will not be detected. Open the Brother scanning software on your computer and select your device from the list. Place your document on the scanner bed and choose your scan settings. Then click scan.
The file will transfer directly to your computer without cables. This method is especially useful in offices where multiple users share one printer.
Scanning Using Printer Control Panel
Many modern Brother printers allow scanning directly from the control panel. Start by placing your document on the scanner glass or feeder. Choose the “Scan to PC” option on the printer display. Then choose your computer name from the list. Press OK, and the scanning process will begin automatically.
The scanned file will appear on your computer in the selected folder or software window. This method is quick and convenient for everyday scanning tasks.
Scanning to PDF Format
Scanning to PDF is one of the most commonly used features. Open your Brother scanning software and select “Scan to PDF.” This option is perfect for documents, contracts, and multi-page files. You can even combine multiple pages into a single PDF file for better organization. After scanning, save the file with a clear name so you can find it easily later.
Scanning and Sending via Email
Some Brother software versions allow direct scanning to email. Select the “Scan to Email” option in the program. Once the document is scanned, it will automatically attach to a new email draft in your default email application. You can then enter the recipient’s address and send it instantly. This feature saves time and improves workflow efficiency.
Adjusting Scan Settings for Better Results
Before scanning, you can adjust settings like resolution, color mode, and file type. Increased resolution offers enhanced clarity but leads to bigger file sizes. For everyday documents, medium resolution works well. Use black-and-white mode for text documents and color mode for photos or graphics. Adjusting these settings ensures better-quality results based on your needs.
Troubleshooting Common Scanning Issues
If your Brother printer is not scanning properly, don’t worry. Try these simple solutions. First, check all connections and restart both devices. Ensure that the appropriate drivers are installed on your computer. Also, confirm that firewall or antivirus software is not blocking the scanning program. If you are using WiFi, ensure both devices are on the same network. Finally, clean the scanner glass to avoid blurry or unclear scans.
Scanning Multiple Pages Easily
If your printer has an automatic document feeder, you can scan multiple pages at once. Load all pages into the feeder and select the multi-page option in the software. The printer will scan each page automatically and either combine them into a single file or save them separately depending on your settings. This feature is especially useful for business documents.
Saving and Organizing Your Scanned Files
After scanning, from Brother printer to computer always save your files in organized folders. You can create categories such as Bills, Work Documents, Receipts, or Certificates. Using clear file names also helps you find documents quickly in the future. Proper organization improves productivity and reduces confusion.
Scanning with Brother printer to computer
Scanning documents with a Brother printer offers many advantages. It helps reduce paper clutter and keeps your important files safe in digital form. It is also useful for sharing documents quickly through email or cloud storage. Students, professionals, and businesses can all benefit from this convenient feature.
Final Thoughts
Scanning from a Brother printer to computer is simple once you follow the correct steps. Whether you use USB, WiFi, control panel, or software, each method is easy and effective. With proper setup, updated drivers, and stable connectivity, you can enjoy smooth scanning every time. This not only saves time but also improves your overall productivity and document management experience.