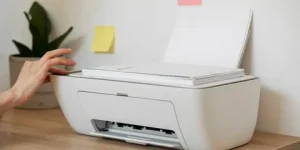
Install Brother printer on your computer is the first step toward enjoying fast, reliable, and high-quality printing. Whether you purchased a laser printer, an inkjet model, or an all-in-one Brother printer, the setup process is straightforward when you follow the correct instructions. Once installed properly, you can print documents, scan files, and manage your printer with ease.
Many users worry that printer installation is complicated. Fortunately, modern Brother printers are designed with user-friendly setup options that work with both Windows and Mac computers. Whether you prefer a USB connection or wireless printing over Wi-Fi, you can complete the installation in just a few simple steps. In this guide, you’ll learn how to install a Brother printer on your computer, fix common installation problems, and keep your printer running smoothly for years to come.
Prepare Before Installing Your Brother Printer
Before you begin, take a few minutes to prepare everything you’ll need. Proper preparation helps avoid unnecessary interruptions during installation.
Make sure you have:
- Your Brother printer fully unpacked
- A power cable connected to the printer
- Your printer switched on
- The printer model number
- A stable internet connection (for wireless installation)
- A USB cable if you’re choosing a wired setup
If you’re installing the printer wirelessly, place it close to your Wi-Fi router during the initial setup to ensure a strong signal.
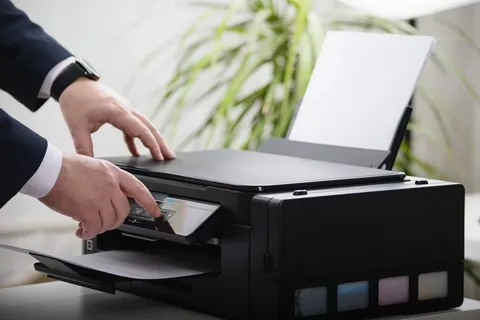
How to Install a Brother Printer Using a USB Cable
A USB connection is one of the easiest ways to install your Brother printer. First, connect the USB cable between your printer and your computer. Turn on both devices and wait a few moments. In many cases, Windows or macOS will automatically detect the printer and install basic drivers.
However, automatic installation doesn’t always provide access to advanced features like scanning, ink monitoring, or maintenance tools. For the best experience, install the latest Brother printer software for your specific model.
During installation:
- Select USB Connection when prompted.
- Follow the on-screen instructions.
- Complete the installation process.
- Restart your computer if required.
Finally, print a test page to verify that the printer has been installed successfully.
Install a Brother Printer Using Wi-Fi
Wireless printing offers greater flexibility because you can print from anywhere on your home or office network. Start by connecting the printer to your Wi-Fi network using the printer’s control panel or wireless setup wizard. Next, install the Brother printer software on your computer.
When the installation wizard starts:
- Choose Wireless Network Connection.
- Allow the software to search for available Brother printers.
- Select your printer from the list.
- Complete the installation.
Once finished, your computer will communicate with the printer through your wireless network without requiring any cables.
Installing a Brother Printer on Windows
Windows users can install a Brother printer quickly through the system settings. Open Settings, then select Bluetooth & Devices or Printers & Scanners, depending on your Windows version.
Next:
- Click Add Printer or Scanner.
- Wait while Windows searches for nearby printers.
- Select your Brother printer.
- Follow the installation prompts.
If your printer doesn’t appear automatically, choose the option stating that the printer isn’t listed and complete the manual setup. After installation, set the Brother printer as your default printer to simplify future printing tasks.
Installing a Brother Printer on Mac
Mac users can also complete installation in just a few steps. Open System Settings (or System Preferences on older versions) and navigate to Printers & Scanners.
Then:
- Click the + icon.
- Select your Brother printer.
- Install any recommended drivers.
- Click Add.
Your printer should now be ready for printing, scanning, and other supported functions.
Why Printer Drivers Matter
Printer drivers allow your computer and printer to communicate properly. Without the correct driver, your printer may not function as expected.
Installing the proper driver provides access to:
- High-quality printing
- Scanner functionality
- Ink or toner monitoring
- Maintenance tools
- Firmware updates
- Advanced print settings
Always use the latest driver that matches both your Brother printer model and your operating system.
Test Your Printer After Installation
After setup is complete, verify everything is working correctly. Open any document and click Print. Select your Brother printer and print a test page.
If the page prints correctly, your installation was successful. If nothing happens, restart both your printer and computer before testing again.
Common Installation Problems and Their Solutions
Although installation is usually simple, some users experience minor issues.
If your computer cannot detect the printer:
- Check the USB cable.
- Restart both devices.
- Try another USB port.
-
Ensure both devices are linked to the same Wi-Fi network.
If driver installation fails:
- Remove previous Brother software.
- Restart your computer.
- Install the latest driver again.
If your printer appears offline:
- Verify the network connection.
- Restart your Wi-Fi router.
- Set the printer as the default device.
These simple troubleshooting steps solve most installation problems.
Installing the Printer on Multiple Computers
Many homes and businesses use one Brother printer with several computers. If your printer is connected through Wi-Fi, simply install the Brother software on each computer individually.
During setup, each computer will detect the same printer on the network, allowing everyone to print wirelessly. This setup is ideal for families, small offices, classrooms, and shared workspaces.
Set Up Mobile Printing
Brother printers also support mobile printing from smartphones and tablets. Download the official Brother mobile printing app on your Android or iPhone.
After installation:
- Connect your phone to the same Wi-Fi network.
- Open the Brother app.
- Select your printer.
- Print documents, photos, emails, and PDFs directly from your device.
Mobile printing adds convenience, especially for remote work and home offices.
Maintain Your Brother Printer for Better Performance
Regular maintenance helps extend your printer’s lifespan and improves print quality.
Follow these best practices:
- Keep printer drivers updated.
- Clean the printer regularly.
- Use genuine Brother ink or toner cartridges.
- Avoid leaving paper inside for long periods.
- Print occasionally to prevent ink from drying.
- Restart the printer periodically to refresh system performance.
Routine maintenance reduces the chances of unexpected printing problems.
When to Contact Technical Support
If you’ve followed every installation step and your Brother printer still doesn’t work, the issue may involve hardware or network configuration.
Professional support may be necessary if you experience:
- Repeated installation failures
- Hardware error messages
- Persistent wireless connection problems
- Driver conflicts
- Scanner not functioning
- Firmware-related issues
Getting expert assistance can save time and prevent unnecessary frustration.
Conclusion
Installing a Brother printer on your computer is a straightforward process that takes only a few steps. Whether you choose a USB or wireless connection, proper installation ensures reliable printing, scanning, and copying from the very beginning.
By using the correct drivers, following the recommended setup process, and performing regular maintenance, you can enjoy dependable performance for years to come. If issues arise, simple troubleshooting often resolves them quickly, allowing you to get back to work without unnecessary delays.
With the right setup and routine care, your Brother printer will continue delivering fast, high-quality results for both personal and professional use.