


Introduction
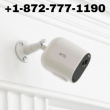
In today’s world, installing a reliable home-security camera system is more accessible than ever especially with the latest models from Arlo. Below is a detailed guide to setting up three of their popular wireless spotlight cameras: the Pro 4, the Essential Spotlight, and the Ultra 2. This article covers everything you need for installation, configuration, tuning settings, and optimal placement. Plus, if you run into any questions or need help, you can call +1-872-777-1190 for support and guidance.
Why Choose These Cameras?
Before diving into the setup steps, it’s worth reviewing what each model brings to the table so you can decide where each fits in your home.
- Arlo Pro 4 Spotlight: A strong mid-tier wireless camera with 2K HDR video, built-in spotlight and siren, and direct WiFi connection (no hub required).
- Arlo Essential Spotlight: A more affordable wire-free option that still gives you integrated spotlight, color night vision, and simple WiFi setup.
- Arlo Ultra 2 Spotlight: The top-of-the-line unit offering 4K HDR video, ultra-wide field of view, premium 2-way audio, and enhanced range.
All three models integrate with the Arlo Secure app for live streaming, alerts, and remote access — meaning you can monitor your home from your smartphone or tablet.
General Pre-Setup Checklist
Before you unpack and install your cameras, take a moment to prepare:
- Make sure your home WiFi is solid in the areas you plan to install the cameras (signal strength matters).
- Charge any battery-powered units fully before installation (if applicable).
- Download the Arlo Secure app from the Apple App Store or Google Play.
- Identify mounting spots: think high enough to see the area, but avoid pointing directly at bright lights or objects that move frequently (e.g., trees in wind).
- If a model requires a hub or base station, make sure you have it ready and connected.
Step-by-Step Setup: Arlo Pro 4 Spotlight
Here’s how to install the Arlo Pro 4 model.
1. Download & open the Arlo Secure app
Open the Arlo Secure app, sign in or create an account, and tap Add New Device > Camera.
2. Charge/Insert Battery
If your Pro 4 is battery-powered, insert the rechargeable battery and charge it until full. The quick start guide covers this stage.
3. Connect to WiFi
Unlike older Arlo models that required a hub or base station, the Pro 4 can connect directly to your home WiFi router. Follow the in-app prompts to select your WiFi network and enter the password.
4. Mount the Camera
Use the included magnetic mount or screws to install the camera in your chosen location. Make sure it’s angled for optimal coverage and has a clear view of the area you want to monitor.
5. Configure Settings
In the app you’ll be able to:
- Name the camera (e.g., Front Porch)
- Set motion zones and sensitivity
- Enable the spotlight and siren features
- Choose arming / disarming schedules
6. Test Your Setup
Trigger motion near the camera and verify that you receive an alert on your phone, watch the live feed, and operations like the spotlight/siren work.
Step-by-Step Setup: Arlo Essential Spotlight
This model is ideal for simpler installations — like a side yard or back entrance.
- In the Arlo Secure app: Tap Add New Device > Camera, then select the Essential model. Insert and/or charge the battery if applicable.
- Connect to WiFi directly (no hub needed): The Essentials series supports direct WiFi connection.
- Mount the Camera: Choose a location with good WiFi reception and a clear line of sight. Use the included hardware for attachment.
- Customize in the app: Set up alert preferences, zone settings, and any integrated spotlight/siren features.
- Final test: Walk by the camera, check that the alert arrives, and make sure the live view and notifications function correctly.
Step-by-Step Setup: Arlo Ultra 2 Spotlight
The Ultra 2 is the premium option slightly more involved due to the hub requirement, but worth it for the advanced features.
- Unbox and connect the SmartHub: Plug in the included SmartHub/Base Station via Ethernet to your router and connect the power adapter.
- Download the Arlo Secure app: Add the SmartHub (if needed) then add the camera: Add New Device > Camera > Ultra Series. Insert battery (if wire-free) or connect power.
- Mount the camera: Pick a spot with strong WiFi/hub signal, aim it for good coverage, and secure it using included mount hardware.
- Configure in the app: Because of the 4K HDR video capabilities, be sure to set:
- Recording quality
- Activity zones
- Alerts and notifications
- Spotlight and audio settings
See community tips for setting zones and optimizing settings.
- Test everything: Watch the live stream, trigger motion, verify alert delivery, test two-way audio, and ensure the spotlight illuminates as intended.
Tips for Getting the Best Performance
- WiFi network: Ensure your router broadcasts on 2.4 GHz and/or 5 GHz and your camera location has a stable signal. One user noted: “Set up your router to only broadcast 2.4GHz radio … Turn off any smart-connect feature.”
- Mount height & angle: Place cameras 7–10 ft high, angled slightly downward for best motion detection and minimal false triggers.
- Avoid obstructions: Trees, large metal objects, or WiFi interference can degrade signal strength.
- Night vision & spotlight: Test illuminate feature at night to confirm the spotlight covers the area you expect.
- Firmware updates: After setup, check the app for any firmware updates to ensure full compatibility and security.
- Cloud/storage plan: Consider signing up for the Arlo subscription to get longer cloud-recording history and advanced features.
- Account security: Enable two-step verification in the app to keep your account and video feed secure.
Troubleshooting Common Issues
Here are some fixes for issues you might encounter:
- Camera won’t sync to WiFi or hub: Make sure you’re within range during setup (the hub suggestion for older Pro models was within 3–6 ft).
- Video feed is choppy or drops: Check signal strength and consider moving the router/hub closer or adding a WiFi extender.
- Motion alerts too frequent or too rare: Adjust the sensitivity settings and motion zones in the Arlo Secure app.
- Spotlight not activating: Confirm in settings that the spotlight is turned ON, that it’s receiving power (if wired), and mounted where it’s unobstructed.
- Battery drains quickly: For battery models, reduce activity, lower resolution (if it has that option), or mount in a location with better solar/higher efficiency (if using solar accessory).
If you need additional help, you can call +1-872-777-1190 to speak with a support specialist.
Final Thoughts
With the Arlo Pro 4, Essential Spotlight, and Ultra 2 Spotlight cameras, you’ll be well-equipped to build a comprehensive home-security network indoors and out. The key lies in thoughtful placement, proper connectivity, and customizing your app settings to match your home environment and lifestyle preferences.
Remember: after the hardware is installed, the real power comes from the app configuration motion zones, alert settings, schedule automation, and how you use features like the spotlight and siren.
If you ever hit a snag during setup or want personalized configuration advice, don’t hesitate to call +1-872-777-1190 we’re here to help your system operate as smoothly and effectively as possible. Stay secure, and enjoy the peace of mind that comes with a well-installed, professionally configured security camera system!