1. Introduction: Meet Sandy Written house, Your iPhone Guide
Meet Sandy Written house, a tech enthusiast with a passion for making the most out of your iPhone. In this article, she dives deep into Guided Access, a hidden gem that empowers you to harness your iPhone’s potential for focused productivity.
2. Guided Access Unveiled: Your Productivity Ally
Discover the magic of Guided Access – an iPhone accessibility feature designed to limit distractions and enhance your focus. Learn how this feature confines your device to a single app, eliminating the temptation of other applications.
3. Take Control: Initiating a Guided Access Session
Setting up a Guided Access session is almost identical on iOS and iPadOS. Here’s how it works:
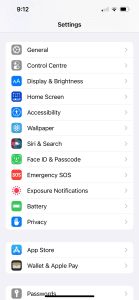
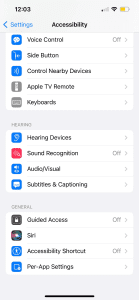
- Open Settings > Accessibility.
- Scroll to the bottom and tap Guided Access.
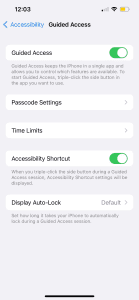
- Move the slider to enable Guided Access.
Enabling the feature does not mean that your Guided Access session has started. You’ll need to take an additional action to begin. Before you do that, take a look at these additional settings you can now see:
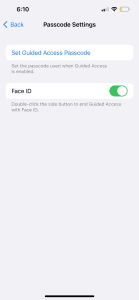
- Passcode Settings: Set a specific passcode for Guided Access, or use Touch ID (or Face ID) for a session.
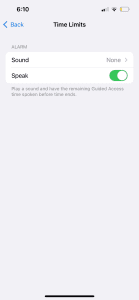
- Time Limits: Set an alarm sound or have the time remaining in the session spoken aloud before time ends. This only applies if you use a time limit for the session (see below).
- Accessibility Shortcut: When enabled, accessibility shortcuts will display if you triple-click the Side (or Home) button during a session. You can customize the features listed in the Accessibility Shortcut by going to Settings > Accessibility > Accessibility Shortcut.
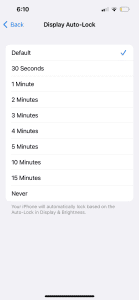
- Display Auto-Lock: When the default option is selected, Guided Access will match your auto-lock settings in Display & Brightness.
Image by https://www.makeuseof.com/ Image by https://www.makeuseof.com/ Image by https://www.makeuseof.com/
How to Use Guided Access on an iPhone or iPad
When you’re ready to start a Guided Access session, open the app you want to use during the session. Remember, it only works with one app at a time.
Triple-click the Side (or Home) button to start your Guided Access session. You can also ask Siri to help you out by saying, “Turn on Guided Access.”
You can then tap Start at the top-right corner to begin your session immediately. Alternatively, take a moment to explore the Options available for your session.
Options Available for Guided Access
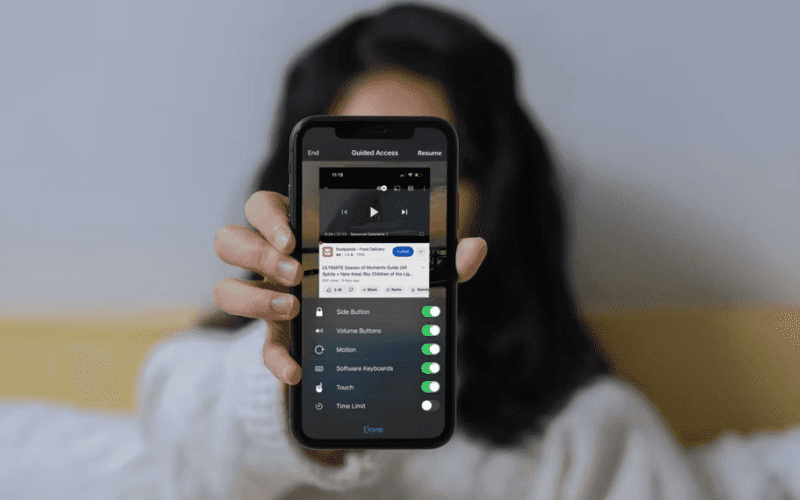
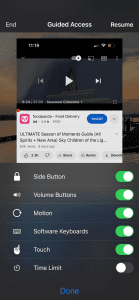
- Side Button: Enable or disable the Side button.
- Volume Buttons: Enable or disable the volume buttons.
- Motion: Allow or disallow motion, such as screen rotation.
- Software Keyboards: Enable or disable access to the keyboard.
- Touch: Allow or block screen touches.
- Time Limit: Enable and set a time limit for the Guided Access session.
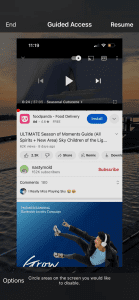
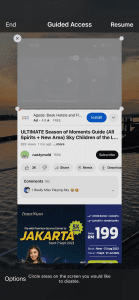
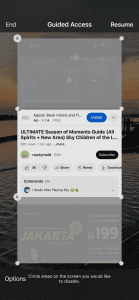
Image by https://www.makeuseof.com/ Image by https://www.makeuseof.com/ You will notice a tip on the Guided Access screen explaining that you can “Circle areas of the screen you would like to disable.” This is useful for keeping yourself or others from tapping certain parts of the app or screen during the session. Simply use your finger to circle the areas you want to disable, and you’ll see a shape display that you can make larger or smaller, as well as move or delete.
Image by https://www.makeuseof.com/ Image by https://www.makeuseof.com/ How to End a Guided Access Session
If you set up a time limit from the Guided Access Options area, the session will end when the time is up. You’ll see a notification asking you to triple-click your Side (or Home) button to enter your passcode.
Image by https://www.makeuseof.com/ Image by https://www.makeuseof.com/ You can also manually end a session at any point by triple-clicking your Side (or Home) button and entering your passcode. Remember, if you set a specific passcode for Guided Access, you’ll need to enter that one. If not, you’ll need to enter your device passcode.
Alternatively, if you enabled the feature when you turned on Guided Access, you can double-click the Side (or Home) button and use Face ID or Touch ID, depending on your device.
Notes on Guided Access
Here are a few extra points to keep in mind when using Guided Access:
- If you don’t see Options on the Guided Access screen, try triple-clicking your Side (or Home) button again and entering your passcode. If you’re facing other similar glitches, you can try these solutions to get Guided Access working again.
- When you use Guided Access in your app of choice, you’ll notice that the areas you circled and the options you set earlier will carry over to a new session for that app. This is convenient, as you don’t have to select these items again.
- You can change the options you use for a session midway ;if needed. End the session and tap Options to make your changes. Once satisfied, select Done and tap Resume to continue the session.
Embrace Productivity with Guided Access
As you wrap up the journey through Guided Access, Sandy emphasizes its potential to boost productivity. She encourages readers to integrate this tool into their daily routines, transforming the way they interact with their iPhones.
About the Author: Sandy Written house
Meet Sandy Written house, an avid tech writer and iPhone aficionado. With years of experience in the tech industry, Sandy’s insights are rooted in real-world applications. Her goal is to empower users to maximize their devices’ capabilities for enhanced productivity.
Key Points Table: Guided Access at a Glance
| Topic | Key Takeaways |
|---|---|
| What Is Guided Access? | Limit your device to one app, minimize distractions, and enhance focus. |
| Initiating a Session | Triple-click the Side or Home button, activate Siri, or use Settings. |
| Customization Options | Set passcodes, time limits, and tailor accessibility shortcuts. |
| Using Guided Access | Begin a session, explore options, circle screen areas to disable touches. |
| Ending a Session | Triple-click to end, manual exit, passcode entry, and alternative methods. |
| Guided Access vs. Screen Time | Guided Access for focused sessions, Screen Time for overall device management. |
| Problem-Solving with Guided Access | Handy solutions for child usage, important tasks, and productivity enhancement. |
| Embracing Enhanced Productivity | Integrating Guided Access into daily routines for a more productive iPhone experience. |
Comparative Table: Guided Access vs. Screen Time
| Feature | Guided Access | Screen Time |
|---|---|---|
| Functionality | Limits device to a single app for focused tasks. | Manages overall device usage, app restrictions, and content filters. |
| Use Cases | Ideal for specific tasks, e.g., work, learning. | Manages overall device usage, e.g., setting screen time limits for specific apps or categories. |
| Customization | Customizable options during sessions. | Provides detailed insights into overall device usage patterns. |
| Flexibility | Flexible for focused work, minimal interaction. | Offers broader control over device usage, suitable for managing screen time. |
| Target Audience | Individuals seeking focused work or learning sessions. | Families, parents, individuals managing device usage. |
| Goal | Enhances productivity by limiting distractions. | Manages device usage to strike a balance between screen time and other activities. |


