Introduction:
Ice makers are a convenient addition to any kitchen, providing a steady supply of ice for your drinks and beverages. However, to ensure that your ice remains pure, refreshing, and free from any contaminants, it’s essential to keep your ice maker clean and well-maintained. In this comprehensive guide, we’ll walk you through the step-by-step process of cleaning your ice maker, offering advanced techniques, tips, and in-depth insights to ensure your ice maker functions at its best. Before delving into the cleaning process, it’s crucial to understand why cleaning your ice maker is necessary. Ice makers can become a breeding ground for bacteria, mold, and other contaminants over time. These unwanted guests can affect the quality and safety of the ice you consume. Regular cleaning not only ensures your ice is safe to use but also extends the lifespan and performance of your ice maker.

Gather Your Tools and Materials
- Warm, Soapy Water: This will be your primary cleaning solution.
- White Vinegar: Ideal for removing mineral deposits and disinfecting.
- Soft Cloth or Sponge: To scrub and wipe down surfaces.
- A Toothbrush: For reaching small, tight spots.
- Sanitizing Solution: A commercial ice machine cleaner is recommended.
- Latex Gloves: To protect your hands during the cleaning process.
- A Clean Towel: For drying and polishing.
- Owner’s Manual: For manufacturer-specific cleaning instructions.
- Screwdriver: To disassemble the ice maker if necessary.
Safety First
Before you start the cleaning process, ensure your ice maker is unplugged or disconnected from the power source. Safety should always be a top priority when working with electrical appliances.
Cleaning the Ice Maker
Follow these steps to thoroughly clean your ice maker:
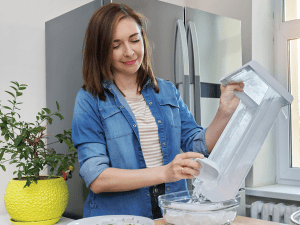
Step 1: Empty the Ice Bin
Before cleaning, empty the ice bin completely. You can use this ice later or discard it, depending on your preference.
Step 2: Remove and Clean Removable Parts
Many ice makers have removable parts like ice trays and water lines. Take them out and clean them separately. Soak them in warm, soapy water and use a toothbrush to scrub away any residue. Rinse thoroughly and ensure they’re completely dry before reassembling.
Step 3: Clean the Interior
Use a soft cloth or sponge and warm, soapy water to wipe down the interior surfaces of the ice maker. Pay extra attention to areas prone to mold and bacteria growth, such as the water reservoir and ice mold.
Step 4: Sanitize with Vinegar
To remove mineral deposits and disinfect, create a solution of equal parts water and white vinegar. Apply this solution to the interior and let it sit for about 10-15 minutes. Then, rinse with clean water thoroughly to remove any vinegar residue.
Step 5: Use Commercial Cleaner
If you have a commercial ice machine cleaner, follow the manufacturer’s instructions to use it for an extra layer of sanitization and to dissolve any stubborn buildup.
Step 6: Clean the Condenser Coil
The condenser coil is responsible for maintaining the ice maker’s temperature. It can become clogged with dust and debris, affecting its efficiency. Refer to your owner’s manual for guidance on accessing and cleaning the condenser coil.
Step 7: Reassemble the Ice Maker
Once all parts are clean and dry, reassemble the ice maker. Be sure to follow your owner’s manual’s instructions for proper reassembly.
Step 8: Plug It in and Make Ice
After ensuring everything is properly assembled, plug in or reconnect your ice maker to the power source. Allow it to run for a few cycles to flush out any remaining cleaning solution. The first batch of ice produced after cleaning should be discarded.

KeyPoint:
| Step | Task | Description |
|---|---|---|
| 1 | Empty the Ice Bin | Remove all ice from the bin before starting the cleaning process. |
| 2 | Remove and Clean Removable Parts | Take out and clean any removable components such as ice trays and water lines. |
| 3 | Clean the Interior | Use warm, soapy water and a soft cloth or sponge to clean the interior surfaces. |
| 4 | Sanitize with Vinegar | Create a solution of equal parts water and white vinegar to disinfect and remove mineral deposits. |
| 5 | Use Commercial Cleaner | If available, use a commercial ice machine cleaner as directed by the manufacturer for extra sanitization. |
| 6 | Clean the Condenser Coil | Consult the owner’s manual for instructions on cleaning the condenser coil to maintain temperature control. |
| 7 | Reassemble the Ice Maker | Ensure all components are properly reassembled as per the manufacturer’s guidelines. |
| 8 | Plug It in and Make Ice | Reconnect the ice maker to the power source and allow it to run a few cycles to remove any cleaning residue. |
Conclusion:
Maintaining a clean and hygienic ice maker is essential for ensuring that the ice it produces is not only refreshing but also safe for consumption. By following the step-by-step guide and implementing the advanced techniques and tips provided you can enjoy peace of mind knowing that your ice maker is in optimal condition. Regular cleaning and maintenance not only contribute to the quality and safety of your ice but also extend the overall lifespan and efficiency of your ice maker. Here are some key takeaways from this guide Regularly inspect your ice maker for leaks and ensure the surrounding area is clean and free from debris. Preventive measures are often more manageable than dealing with significant issues.


