


Introduction
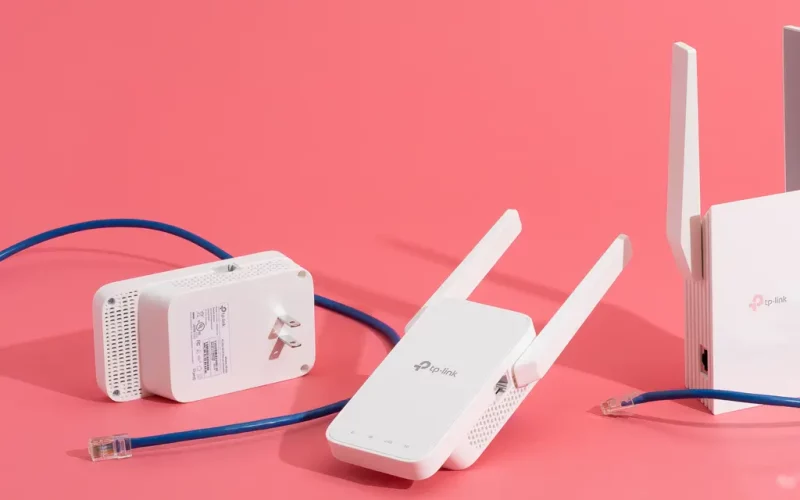
Setting up a wireless extender can help eliminate Wi-Fi dead zones and improve signal strength across your home or office. If your Wi-Fi extender uses the IP address 192.168.188.1 for configuration, this guide will walk you through the complete setup process. You do not need to be tech-savvy to follow along.
This step-by-step tutorial is designed to help beginners understand how to access the extender’s admin page, configure it to work with an existing router, and optimize placement for the best performance.
Click Here For Live Chat
What is 192.168.188.1?
The IP address 192.168.188.1 is a private default gateway used by certain wireless range extenders. It is used to access the web-based setup page, where you can configure your extender’s settings.
This IP address is not accessible from the internet. It is only used within your local network, and you can only access it when your device is directly connected to the extender’s network.
Devices That Commonly Use 192.168.188.1
This IP address is typically used by less well-known or generic brands of Wi-Fi extenders. Devices from brands like Tenda, Wavlink, Cudy, and some other OEM manufacturers may use this address by default. Always check the user manual or the label on your device to confirm the correct IP address.
What You Need to Get Started
Before beginning the setup process, make sure you have the following:
- A wireless extender that uses the IP address 192.168.188.1
- A smartphone, tablet, or computer with Wi-Fi capability
- Your existing Wi-Fi network name (SSID) and password
- Access to a power outlet near your main router (for the initial setup phase)
How to Access the Extender Using 192.168.188.1
Follow these steps to log into your extender’s web interface:
Step 1: Power On the Extender
Plug your extender into a power outlet close to your router. Wait for the device to fully boot up. This usually takes about one to two minutes, and you may see a steady light indicating that the extender is powered on.
Step 2: Connect to the Extender’s Wi-Fi Network
On your computer, tablet, or smartphone, go to your Wi-Fi settings and look for the extender’s default network. The name will usually contain the brand or the word “EXTENDER” or “SETUP”. Select the network and connect to it. No password is usually required at this point.
Step 3: Open a Web Browser
Once connected to the extender’s Wi-Fi, open your preferred web browser such as Chrome, Firefox, Safari, or Edge. In the address bar, type:
- http://192.168.188.1
- Then press Enter.
This should load the extender’s login page. If it does not, try refreshing the page, restarting your device, or using another web browser.
Step 4: Log In to the Admin Page
You will be asked to enter a username and password. The default login credentials are commonly:
- Username: admin
Password: admin or password
If these do not work, check the back of the extender or consult the manual.
How to Configure the Extender
After logging in, you will be taken to the admin dashboard. From here, you can begin the actual configuration process.
Step 1: Choose Repeater or Extender Mode
Most extenders offer different operation modes. Choose “Repeater Mode” or “Extender Mode” to continue with setup. This tells the device that it will be used to extend your current Wi-Fi network, not replace it.
Step 2: Scan for Available Networks
Click the option to scan for nearby Wi-Fi networks. A list will appear showing all available wireless networks in range.
Step 3: Connect to Your Router’s Wi-Fi
From the list, select your existing home or office Wi-Fi network. Enter the correct Wi-Fi password when prompted.
Step 4: Set a Name for the Extended Network
You will now be asked to assign a name (SSID) to the extended network. You can choose to keep the same name as your original network or add something like “_EXT” at the end to distinguish it.
For example:
Original network: HomeNetwork
Extended network: HomeNetwork_EXT
Keeping the same name allows your devices to switch between router and extender automatically, but using a different name can help you identify which one you are connected to.
Step 5: Save and Reboot
Once you have reviewed your settings, click “Apply” or “Finish.” The extender will restart to apply the changes. This process may take one or two minutes. After rebooting, the extended network should be live and ready to use.
Where to Place Your Extender
After the initial setup, unplug the extender and place it in a more central location between your router and the area with weak Wi-Fi signal. For best results:
- Avoid thick walls, metal objects, and appliances like microwaves
- Place the extender at an elevated position such as a shelf or wall outlet
- Ensure it is still within the range of your main router’s signal
Some extenders have signal indicator lights that help you find the best location. Green lights usually mean a strong connection, while red or orange lights indicate a weak signal.
Troubleshooting Setup Issues
If you experience problems during setup, here are some common fixes:
1. Cannot Access 192.168.188.1
- Make sure you are connected to the extender’s Wi-Fi network
- Try using a different browser or clearing your cache
- Restart the extender and your computer or mobile device
2. Forgot Login Credentials
- Reset the extender to factory settings by holding the reset button for 10 to 15 seconds
- After the reset, use the default login information to access the admin panel again
3. Extended Network Has No Internet
- Make sure you entered the correct password for your main Wi-Fi network
- Check that your main router is connected to the internet
- Move the extender closer to the router and reconfigure the connection
Resetting the Extender
If you need to start over or something is not working correctly, perform a factory reset.
- Locate the reset button on the extender (usually a small pinhole)
- Use a pin or paperclip to press and hold the reset button for at least 10 seconds
- Release the button once the lights start flashing
- Wait for the extender to reboot, then begin setup again using 192.168.188.1
Using a Mobile App (If Available)
Some extenders support mobile apps for easier setup and monitoring. If your device has a compatible app, download it from the App Store or Google Play. You can usually complete setup, monitor connected devices, and perform firmware updates through the app.
Popular apps include:
- TP-Link Tether
- Netgear Nighthawk
- D-Link WiFi
- Tenda WiFi
Check your user manual to see if your device supports a mobile app.
Conclusion
Setting up a wireless extender using 192.168.188.1 is a simple task that can make a big difference in your internet coverage. By following the steps outlined in this guide, you can easily connect your extender to your existing Wi-Fi network, eliminate dead zones, and enjoy seamless internet access across your space.
If you encounter any issues, remember that resetting the device and starting fresh is often the fastest way to resolve problems. Always consult your extender’s manual for model-specific instructions.
With the right setup and placement, your extender can significantly improve your Wi-Fi performance, ensuring that all your devices stay connected wherever you are in your home or office.