


Introduction
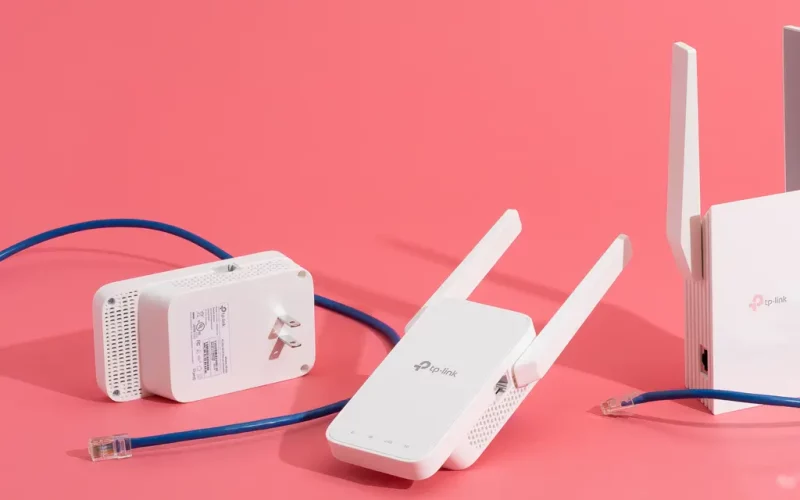
Are you tired of weak Wi-Fi signals in certain corners of your home or office? If your internet connection struggles to reach every room, a wireless extender can be the perfect solution. It boosts your existing Wi-Fi signal, helping you enjoy fast internet throughout your space. One common IP address used for setting up wireless extenders is 192.168.188.1.
In this guide, we’ll walk you through how to set up a wireless extender using 192.168.188.1. Whether you’re a tech beginner or someone who just needs a little help, don’t worry. This article explains everything in simple steps that anyone can follow.
What is 192.168.188.1?
192.168.188.1 is a private IP address commonly used to access the setup page of wireless range extenders and some routers. When you type this number into your web browser’s address bar, it opens the login page where you can configure your device.
This IP is not for browsing the internet. Instead, it connects you to your extender’s control panel. From there, you can change settings, update firmware, and link the extender to your main router.
A WiFi extender, also known as a WiFi range extender or wireless repeater, is used to extend the coverage area of a wireless network. It does this by receiving the existing WiFi signal and re-transmitting it to areas of the home or office where the original signal may not reach. The WiFi extender 192.168.188.1 admin setup helps in situations where the main router is located in a central location but certain rooms or areas have weak or no signal. If you are also having problem in accessing internet due to weak WiFi signals, this guide can help.
Here we are sharing easy instructions on how to complete the 192.168.188.1 Admin Setup with simple steps. Keep reading to find the simple steps below:
Features Supported
- Dual-band or tri-band: This feature allows for faster speeds and better performance by operating on both 2.4GHz and 5GHz frequency bands or even a third one.
- Gigabit Ethernet port: A built-in Ethernet port allows for connecting wired devices, such as gaming consoles or smart TVs, to the network.
- Parental controls: Set up parental controls to block certain websites or restrict access to the internet during certain times of the day.
- Smartphone app: Manage and configure the 192.168.188.1 Admin Setup using a smartphone app, allowing you to access and control the extender from your mobile device.
Setup WiFi extender 192.168.188.1: Steps to follow
- To set up a WiFi extender, you will need to connect to it using a web browser and enter the default IP address, which is typically 192.168.188.1 Admin Setup or “192.168.1.1.
- Now, you need to enter the default username and password, which can usually be found in the manual or on the bottom of the device. In most cases, the default username and password are “admin”, however, it is recommended to go through the manual.
- Once you have accessed the extender setup page, you will need to select the option to connect it to your existing wireless network.
- For this, you need to enter the name (SSID) and password of your existing network.
Finally, you will need to place the extender in a location that is within range of your existing wireless network and close to the area where you need to extend the signal. This will ensure that the extender can pick up the existing signal and amplify it to extend the reach of your network.
Note: Keep in mind that WiFi extender 192.168.188.1 admin setup process may vary slightly depending on the specific model of WiFi extender that you are using. It’s always a good idea to consult the manual or reach out to the manufacturer’s customer support if you have any questions or run into any issues during the setup process.
Take Away
You can complete the WiFi extender 192.168.188.1 admin setup in a few simple steps. Make sure you place extender in an area where it can receive a strong signal from the main router.Once the extender is connected and configured, it should be placed in the area of the home or office where the additional coverage is needed. It is important to keep in mind that the extender will only provide coverage in the area where it is placed, and the signal strength may decrease as you move further away from the extender. This post above describes all the setup steps you can follow to complete the process. However, if you have any query, do not hesitate to contact the experts for professional assistance.
FAQs: 192.168.188.1 Wireless Extender Setup
Q1. What is 192.168.188.1 used for?
192.168.188.1 is a private IP address commonly used as the default gateway for some Wi-Fi extenders or routers. It is used to access the device’s web-based setup page to configure wireless settings, security options, and more.
Q2. How do I access the extender setup page using 192.168.188.1?
Follow these steps:
- Plug in your wireless extender and turn it on.
- Connect your computer or mobile device to the extender’s Wi-Fi network (usually named something like “EXTENDER-SETUP”).
- Open a web browser and enter http://192.168.188.1 in the address bar.
- You should see the extender’s login page.
Q3. What is the default username and password for 192.168.188.1?
This depends on the manufacturer, but commonly:
- Username: admin
- Password: admin or password
(Refer to the label on your device or the user manual for the correct login.)
Q4. I can’t access 192.168.188.1. What should I do?
Try the following:
- Make sure your device is connected to the extender’s network.
- Check for typos in the IP address (don’t use “www.”).
- Try a different browser or device.
- Clear browser cache or restart your device.
- Reset the extender if needed.
Q5. How do I set up the wireless extender after logging in?
Once logged in:
- Select “Repeater Mode” or “Range Extender Mode.”
- Scan for your main Wi-Fi network.
- Select it and enter the Wi-Fi password.
- Save settings and wait for the extender to reboot.
- Reconnect to the extended Wi-Fi network.
Q6. How do I reset the extender to factory settings?
Find the Reset button on your extender (usually a small hole).
- Use a paperclip to press and hold the button for about 10–15 seconds.
- Wait for the lights to flash or change—this indicates a reset.
- After reset, reconnect to the default extender network and log in via 192.168.188.1.
Q7. How do I know the extender is working properly?
- Check for a solid or blinking green light indicating a good connection.
- Test the internet speed near the extender.
- Ensure devices stay connected to the extended Wi-Fi network without drops.
Q8. Can I change the SSID (Wi-Fi name) and password of the extended network?
Yes. After logging in via 192.168.188.1, go to the Wireless Settings section. You can change the SSID and password there to anything you prefer.
Q9. Is 192.168.188.1 accessible over the internet?
No. 192.168.188.1 is a private IP address, only accessible within your local network. It cannot be reached from the public internet.
Q10. What if my extender doesn’t use 192.168.188.1?
Your device might use a different default IP like 192.168.0.1 or 192.168.1.1. Check the sticker on your device or refer to the user manual.