


Introduction
A wireless extender is a simple yet effective device that helps boost your Wi-Fi signal into areas of your home or office where connectivity is weak or inconsistent. If your wireless extender uses 192.168.188.1 as its default IP address, this guide will walk you through the complete setup process from start to finish.
Whether you are setting up your extender for the first time or reconfiguring it, these easy-to-follow instructions are designed to help beginners complete the process without confusion or technical frustration.
Click Here For Live Chat
Understanding 192.168.188.1
The IP address 192.168.188.1 is a private IP address used by certain models of wireless range extenders and routers as the default access point for configuration. This means you can enter this IP address into your web browser’s address bar to open the device’s admin interface.
This IP address is only accessible when your device (computer, smartphone, or tablet) is directly connected to the extender’s Wi-Fi or via an Ethernet cable, if supported.
Devices That Commonly Use 192.168.188.1
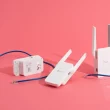
Wireless range extenders from some OEM and budget-friendly manufacturers often use 192.168.188.1 as their setup IP. Brands such as Wavlink, Tenda, Cudy, and others may use this IP address for configuration. Always refer to your device’s label or manual to confirm the correct IP.
What You Need Before You Start
Before beginning the setup process, make sure you have the following:
- A wireless extender that uses 192.168.188.1 as its default IP address.
- A laptop, desktop, smartphone, or tablet with a modern web browser.
- Access to your existing Wi-Fi network’s name (SSID) and password.
- A power outlet near your main router (for easier initial setup).
- A paperclip or pin, in case a reset is needed.
Step-by-Step Instructions to Set Up Your Wireless Extender
Step 1: Power On Your Extender
Plug your extender into a working power outlet near your main router. Most extenders take a minute or two to fully power up. You will usually see a solid power light when it is ready.
Step 2: Connect to the Extender’s Default Network
Using your computer or mobile device, go to the Wi-Fi settings and look for the extender’s default SSID. This might be something like “EXTENDER_SETUP”, “WiFi_Repeater”, or a brand-specific name. Connect to this network.
You may not have internet access at this point, but that is expected during the initial configuration process.
Step 3: Open a Web Browser and Enter the IP Address
Launch a web browser and type the following IP address into the address bar:
http://192.168.188.1
Press Enter to go to the extender’s login page.
If the page does not load, make sure your device is still connected to the extender’s Wi-Fi. You can also try using a different browser or clearing your browser’s cache.
Step 4: Log In to the Admin Interface
On the login page, you will be asked to enter a username and password. The default credentials are usually:
- Username: admin
- Password: admin or password
If these do not work, check the label on the device or refer to the user manual. If you have changed the login credentials in the past and forgotten them, a factory reset may be required.
Step 5: Start the Setup Wizard
Once logged in, most extenders will launch a setup wizard automatically. If not, look for a menu option that says “Setup Wizard”, “Quick Setup”, or “Repeater Mode”.
Select “Repeater” or “Extender” mode when prompted. This tells the device you want to boost an existing wireless signal rather than create a new standalone network.
Step 6: Scan for Your Wi-Fi Network
The extender will scan for nearby wireless networks. A list of available networks will appear. Find your main Wi-Fi network in the list and click on it.
Enter your main Wi-Fi password when prompted. Double-check to ensure accuracy, as incorrect passwords will prevent the extender from connecting properly.
Step 7: Name Your Extended Network
You may be asked to name your extended network. You have two choices:
- Use the same name (SSID) as your main network, which allows for seamless roaming across your home or office.
- Use a different name, such as “HomeNetwork_EXT”, which helps you identify when you are connected to the extender instead of the router.
Make your choice based on how you prefer to manage your Wi-Fi connections.
Step 8: Save Settings and Reboot
Once you have entered all the necessary information, click the “Apply”, “Save”, or “Finish” button. The extender will save your settings and automatically restart.
After rebooting, the extender will begin broadcasting the extended Wi-Fi signal. You can now connect your devices to the extended network.
Optimizing Extender Placement
After setup is complete, unplug the extender and move it to a location about halfway between your main router and the area with poor signal. The goal is to place it where it still receives a strong signal from your router but is close enough to extend coverage into the weak zone.
Tips for placement:
- Avoid placing the extender near thick walls, mirrors, or metal appliances.
- Place it at an elevated position, such as a table or wall outlet.
- Keep it away from microwaves, cordless phones, or Bluetooth devices that may cause interference.
If your extender has signal strength indicators, use them to help find the best position.
Troubleshooting Common Issues
If something goes wrong during setup, try the following solutions.
1. Problem: Cannot Access 192.168.188.1
- Make sure your device is connected to the extender’s Wi-Fi network.
- Restart both your extender and your computer or mobile device.
- Try accessing the IP address using a different web browser or incognito mode.
- Check if your device has a different default IP, such as 192.168.0.1 or 192.168.10.1.
2. Problem: Forgot Login Credentials
If the default username and password no longer work and you do not remember the new ones, perform a factory reset:
- Find the reset button on the extender. It is usually a small hole labeled “Reset”.
- Use a pin or paperclip to press and hold the reset button for 10 to 15 seconds.
- Wait for the extender to reboot, then try logging in with the default credentials again.
3. Problem: No Internet on Extended Network
- Verify that the correct Wi-Fi password was entered during setup.
- Make sure the extender is placed within range of the router.
- Try reconnecting to the main network using the extender’s interface.
Using a Mobile App (If Supported)
Some modern extenders offer mobile apps for easier setup. Check your device documentation to see if your extender supports this feature. Apps are available for download from the App Store or Google Play and may include tools for monitoring signal strength, controlling connected devices, and updating firmware.
Final Thoughts
Setting up your wireless extender using 192.168.188.1 is a straightforward process if you follow the steps carefully. This guide covers everything from initial setup to placement optimization and troubleshooting. Once properly configured, a wireless extender can significantly improve your home or office network, eliminating dead zones and providing a stronger, more reliable signal.
If you still face challenges after setup, consult your extender’s user manual or reach out to the manufacturer’s customer support. They may offer firmware updates or model-specific instructions that can help resolve any remaining issues.