Mastering Hyper-V: Enabling Virtualization on Windows 11
In a tech-driven world, the ability to harness the power of virtualization can be a game-changer. If you’re one of those who enjoy the versatility of virtual machines, then it’s essential to understand how to utilize Hyper-V on Windows 11.
In this article, we will explore the ins and outs of Hyper-V, Microsoft’s robust virtualization solution for Windows 11. Whether you’re a tech enthusiast, a professional, or someone curious about virtualization, you’ll find valuable insights on how to enable Hyper-V and leverage it for various use cases.
What Are the Use Cases for Hyper-V?
Hyper-V is not just another virtualization tool; it’s a native solution that empowers you to run multiple operating systems on your computer without impacting your primary OS. Its versatility makes it a compelling choice for individuals and organizations alike.
Here are some key use cases for Hyper-V:
- Software Testing: Easily test software on older versions of Windows or non-Windows operating systems within a virtual environment.
- Multi-Platform Testing: Run software on multiple operating systems concurrently, all on a single host system.
- Enhanced Uptime: Benefit from disaster recovery features like live migration and failover clustering, ensuring minimal downtime.
- Security Isolation: Create and run virtual machines in isolation for improved security and sandboxing.
Prerequisites to Enable Hyper-V on Windows 11
Before diving into the world of virtualization, you must ensure your system meets the prerequisites for enabling Hyper-V on Windows 11. Here’s what you need:
- Windows 11 Edition: Hyper-V is available as an optional feature on Windows 11 Pro, Enterprise, and Education editions.
- Hardware Resources: Depending on your usage, you may require additional resources to run virtual machines smoothly.
- Hardware Virtualization: Ensure that Hardware Virtualization is enabled in your system’s BIOS. This feature is essential for running virtual machines but is often disabled by default.
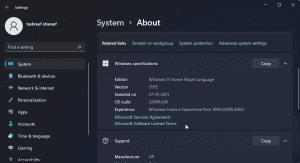
Image by https://www.makeuseof.com/
How to Enable Hardware Virtualization in BIOS
Enabling Hardware Virtualization in your system’s BIOS is a crucial step. Here’s how to do it:
- Power off your PC if it is running.
- Power it on and immediately start pressing the “Esc” key to access the Startup Menu.
- In the Startup Menu, press “F10” to enter the BIOS setup.
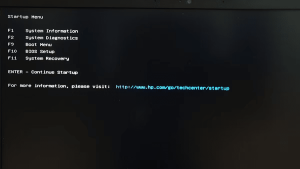
Image by https://www.makeuseof.com/ - In the BIOS Setup Utility, navigate to the “Configuration” tab.
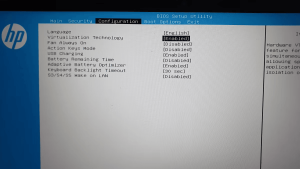
Image by https://www.makeuseof.com/ - Highlight the “Virtualization Technology” option using the arrow keys.
- Press “Enter” and select “Enabled” from the available options.
- Save the changes by pressing “F10” and exit the BIOS.
Your PC will restart to apply the changes.
Enabling Hyper-V in Windows 11
Once Hardware Virtualization is enabled, you can proceed to enable Hyper V on Windows 11 using one of the following methods:
1. Turn On Hyper-V in Windows 11 Via Control Panel:
- Press “Win + R” to open Run.
- Type “control” and click “OK” to open the Control Panel.
- Go to “Programs > Programs and Features.”
- In the left pane, click on “Turn Windows features on or off.”
- Select “Hyper V” and ensure both “Hyper-V Management Tools” and “Hyper V Platforms” are selected.
- Click “OK” and allow Windows to install and enable these features.
- Restart your PC when prompted.
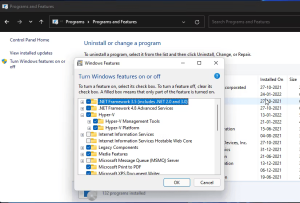
Image by https://www.makeuseof.com/
2. Add Hyper-V to Windows 11 Using Command Prompt:
- Press the “Win” key, type “cmd,” right-click on Command Prompt, and select “Run as Administrator.”
- In the Command Prompt, enter the following command and press “Enter
- Follow the on-screen progress and restart your PC when prompted.
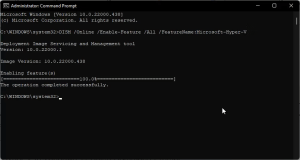
Image by https://www.makeuseof.com/
3. Enable Hyper-V Using PowerShell:
- Press the “Win” key, type “powershell,” right-click on PowerShell, and select “Run as Administrator.”
- In PowerShell, enter the following command and press “Enter”:
- Confirm the action by typing “Y” and restart your PC.

Image by https://www.makeuseof.com/
How to Disable Hyper-V in Windows 11
While Hyper-V is a powerful tool, you may occasionally need to disable it. Here’s how:
- Open PowerShell as an administrator.
- Enter the following command and press “Enter”:
- Wait for the success message, then close PowerShell.
- Restart your PC to apply the changes.
Configuring Hyper-V Settings
Once you’ve enabled Hyper V, it’s time to configure settings for optimal virtual machine performance: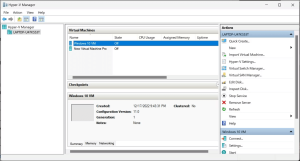
- Hyper-V Settings: Customize your virtual hard disk, virtual machine location, NUMA spanning, and enable enhanced session mode.
- Virtual Switch Manager: Create external, internal, or private switches to manage network access.
- Integration Services: Fine-tune integration services such as Heartbeat, Key-Value pair exchange, Time synchronization, and Volume shadow copy requestor (VSS) to enhance virtual machine functionality.
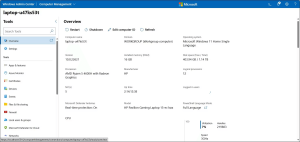
Image by https://www.makeuseof.com/
Consider using the Windows Admin Center for an even more user-friendly management experience.
Many Ways to Enable Hyper-V in Windows 11
Hyper-V is a versatile and powerful virtualization tool that comes pre-installed with Windows 11 Pro, Enterprise, and Education editions. It offers an array of use cases, from software testing to enhanced security. While Hyper V is a solid choice, it’s essential to explore other hypervisor options for specific needs. Check out our comparison of popular hypervisors to find the one that suits you best.
Unlock the potential of virtualization with Hyper-V on Windows 11 and take your computing experience to the next level.
Disclaimer: The information provided in this article is for educational purposes. Make sure to back up your data and proceed with caution when making changes to your system.


