


Introduction
Installing an air conditioner is actually more complex than you may have imagined. It’s important to get it done right because correct installation is what separates good comfort from future repair nightmares.
When performing an AC installation, use a BTU calculator to get the right size of AC for your space. Clean the installation area both inside and outside. Ensure the unit is positioned to allow proper airflow and is level to prevent drainage. Seal and insulate all duct joints for better efficiency. Electrical connections can be handled carefully by a pro. Perform a safety inspection last to make sure everything is bolted on and running perfectly.
Steps for Installing Your AC Unit Perfectly
Here’s what you need to do.
-
Choose the Right AC Unit for Your Space
When it’s time to install, be sure to have the right air conditioner brand and size for your space. An undersized unit won’t cool enough, and one that’s too large will cool the room too quickly without effectively removing humidity. Find the right one using the room size, insulation, and BTU (British Thermal Unit) calculator. In a whole-house system, an HVAC pro must install the system and perform a load calculation on your home before choosing a capacity.
-
Keep the Area Clean Before Installation
Before you install a window AC, cleanliness is everything. Dirt and debris can interfere with and cause damage during installation. Whether you’re installing a window unit, mini-split, or central AC system, ensure the designated space inside and outside is clear of clutter. Wash the walls, floor, and vent openings where the unit or ductwork will be placed.
-
Ensure Proper Placement for Optimal Airflow
An AC unit’s efficiency mainly depends on where you put it. Indoor units need to be installed high on a wall so that cool air can be distributed uniformly across the room. Do not put the units near high-temperature appliances, under direct sunlight, or behind furniture. Outdoor condensers must have adequate space (at least 2–3 feet around the units) and ventilation, and outdoor units should not overheat or lack maintenance access.
-
Confirm the Unit is Properly Leveled
An uneven unit can cause operational problems such as poor drainage, vibrations, and wear and tear. Check that the unit is perfectly level using a spirit level, whether it has been mounted onto the wall or fitted onto the surface. A concrete pad or mount is ideal for supporting outdoor condensers and ensuring stability and levelness.
-
Secure the Outdoor Condenser Unit Properly
The outdoor unit must be mounted on a solid foundation, a concrete pad, or a wooden frame. It must then be heightened to keep it away from any rainwater that pools or snow. Fasten the condenser with anti-vibration mounts or brackets for noise reduction and to prolong system life. Choose a location that provides space for servicing and maintenance later on as well. Read more for further AC installation tips.
-
Insulate and Seal Ducts
Ductwork has to be efficient for proper airflow. When you are putting up a central or split system, seal all duct joints with mastic sealant or metal-backed tape. Correct insulation stops heat loss/gain and makes sure cool air reaches all rooms in your home, with no cold spots. Leaky ducts can cause the system to work harder than designed, increasing energy use and reducing lifespan.
-
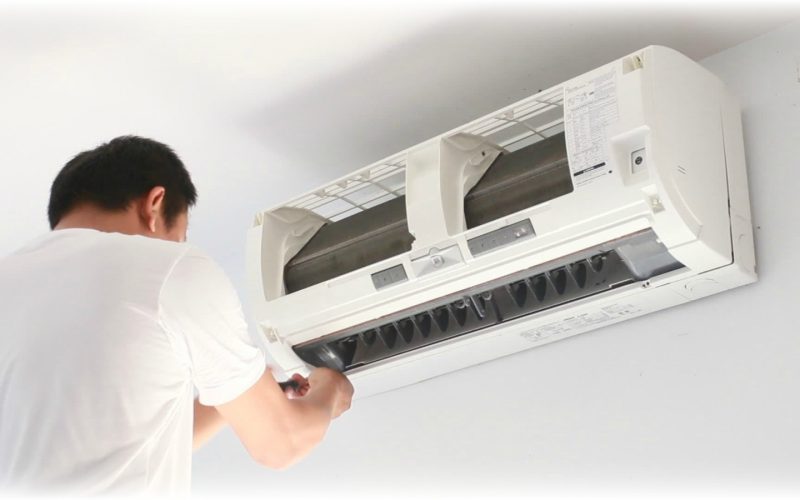
Connect Electrical Wiring Properly & Safely
Electrical connections are something that needs to be dealt with carefully and with the right kind of knowledge. Be sure to cut power at the breaker before any wiring work. Connect conductors correctly as described in the manufacturer’s instructions, including the connection of ground and neutral conductors to the proper terminals of the kit base and to the line terminals of the transfer switch. In central systems, wiring is attached to the thermostat, control board, and power source. If you are not proficient at 120-volt electrical wiring, consult a licensed electrician or HVAC technician.
-
Perform a Final Inspection
Before arming the system, check the unit one last time. Make sure fasteners are tight, pipes are joined watertight, and condensate can flow. Verify proper installation by double-checking the refrigerant lines for leaks or kinks, the filter for the correct size, and that the system has enough clearance for airflow. A proper installation ends with a thorough inspection to prevent minor issues from becoming major problems.
-
Schedule Routine Maintenance
Maintaining your AC system is important to keep it running at maximum performance levels. This might involve cleaning or replacing filters on a 1–3 month schedule, making sure there is enough refrigerant, examining coils, or testing the performance of the system. Routine service will help catch and correct problems sooner, which can help your components to last longer and maintain indoor air quality.
When to Contact a Professional
A window or portable AC may be a piece of cake for most homeowners to install, but when it comes to complex types (split, central, or smart air conditioners), the need for a professional and the right tools becomes essential.
A poor installation not only jeopardizes any manufacturer’s warranty but can also damage the whole system’s performance and life. So, it’s best to hire a certified HVAC technician.
Conclusion
Professional AC installation is one of the best investments to enhance your comfort and property value. Proper sizing, outdoor unit securing, and duct sealing all impact performance and, ultimately, life expectancy. From choosing the right unit to proper mounting and wiring, everything in between matters. A household system will work for years if the AC is installed correctly and properly maintained.
Click here and read more blogs