


As technology continues to advance, building your own custom PC has become an increasingly popular option for computer enthusiasts. By choosing your own components and building the PC from scratch, you can create a personalized machine that meets your specific needs and budget. In this article, we’ll provide a step-by-step guide on how to build your own custom PC.
Step 1: Determine Your Needs and Budget
Before starting to build your custom PC, you should determine your needs and budget. Consider what you’ll be using the PC for and what components are necessary for your desired performance. You’ll also need to decide on a budget, as this will affect the components you can choose.
Step 2: Choose Your Components
Once you have determined your needs and budget, it’s time to choose the components for your custom PC. Here are some of the essential components you’ll need:
- CPU: The Central Processing Unit, or CPU, is the brain of your computer. It processes all the instructions and data and is responsible for the overall performance of the system.
- Motherboard: The motherboard is the main circuit board that connects all the components of your PC. It determines the type of CPU and memory that can be used and the number of expansion slots available.
- RAM: Random Access Memory, or RAM, is where your computer stores data that’s currently being used. The more RAM you have, the more data your computer can handle at once.
- Storage: There are two main types of storage: Hard Disk Drives (HDD) and Solid State Drives (SSD). HDDs are slower but have more storage capacity, while SSDs are faster but have less storage capacity.
- Power Supply Unit (PSU): The PSU is responsible for converting AC power from the wall outlet into DC power that your PC can use. It’s important to choose a PSU that can provide enough power for your components.
- Graphics Card (GPU): If you’re planning on using your computer for gaming or graphic-intensive tasks, you’ll need a dedicated graphics card.
Step 3: Assemble Your Components
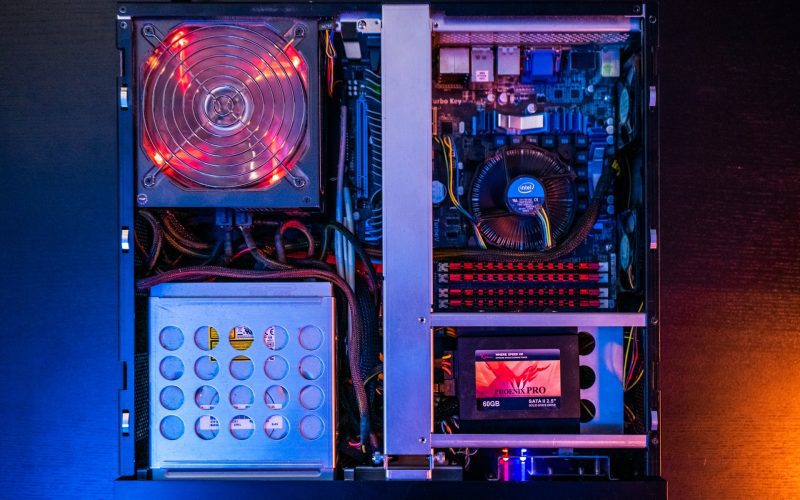
Once you have all the necessary components, it’s time to assemble them into your custom PC. Here are the basic steps:
- Install the CPU onto the motherboard, making sure to align the notches on the CPU and socket.
- Install the RAM into the slots on the motherboard.
- Mount the motherboard into the case, making sure to align the screw holes.
- Install the power supply unit into the case, making sure to connect all necessary cables to the motherboard and components.
- Install the storage devices into the case, making sure to connect the necessary cables.
- Install the graphics card into the motherboard’s PCIe slot, making sure to secure it with the appropriate screws.
- Connect all necessary cables and power up the PC.
Step 4: Install Your Operating System and Drivers
Once your custom PC is assembled, it’s time to install your operating system and drivers. This will vary depending on your chosen operating system, but generally involves creating a bootable USB or DVD and following the on-screen instructions.
Step 5: Test Your PC
After installing your operating system and drivers, it’s important to test your custom PC to make sure everything is working properly. Check all components and peripherals, run stress tests to ensure stability, and install any necessary updates.
In conclusion, building your own custom PC can be a rewarding experience that allows you to create a personalized machine that meets your specific needs and budget. By following these steps, you’ll be well on your way to building your own custom PC.