Introduction: Dropbox on Mac
Meet Jessica Lanman, an experienced tech writer who’s navigated the digital realm for over a decade. Her knack for simplifying complex processes has helped countless users master their devices. Now, she’s here to guide you through the intricate journey of bidding farewell to Dropbox on Mac.
Uninstalling Dropbox on Mac: A Comprehensive Guide
Deciding to Part Ways with Dropbox
Dropbox, a handy cloud storage service, might have served you well. Yet, the time has come for change. Whether you’re opting for a different service or seeking to declutter your Mac, we’ve got your back. Uninstalling Dropbox isn’t as straightforward as a single click, but with our expert guidance, you’ll breeze through the process.
Step 1: Unlinking Your Dropbox Storage
Before you bid farewell to Dropbox, you must first sever its connections. This involves unlinking your Dropbox storage and shutting down its functions on your Mac. Follow these steps:
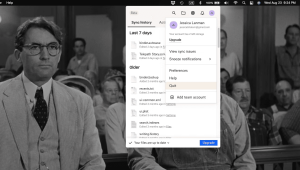
A. Click the Dropbox Icon:
Locate the Dropbox icon in your menu bar—an open box. Click it and then select the profile icon. From there, choose “Quit.” Your Dropbox will cease syncing, enabling you to proceed.
Step 2: Deleting the Dropbox Mac App
With your storage unlinked, it’s time to bid adieu to the Dropbox app itself:
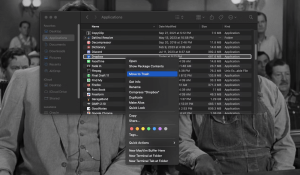
A. Navigate to Applications:
Head to your Applications folder to find Dropbox.
B. Control-Click (Right-Click) and Move to Trash:
Perform a right-click (or control-click) on the Dropbox app, selecting “Move to Trash.” Alternatively, you can drag the app directly to your Trash.
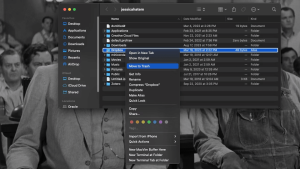
C. Empty Your Trash:
Once you’ve trashed Dropbox, it’s time to empty your trash, ensuring the app’s complete removal.
Cleaning Up: Removing Remaining Dropbox Files
Although the app is gone, traces of Dropbox remain. Let’s clear those out:
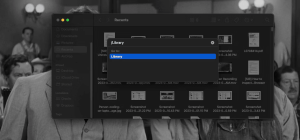
A. Open Finder and Navigate to Your Home:
Launch Finder and go to your Home folder.
B. Locate and Trash the Dropbox Folder:
Find the Dropbox folder, control-click on it, and select “Move to Trash.”
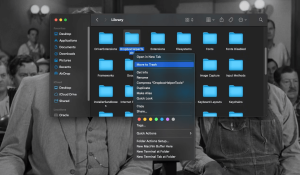
C. Explore the Library:
Locate and Delete DropboxHelperTools: In Finder, go to “Go” and choose “Go to Folder.” Type /Library and locate DropboxHelperTools. Trash it.
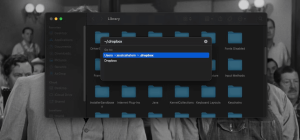
D. Search Your Mac for ~/.dropbox and Dispose of Files:
Once more, use the “Go to Folder” feature to locate ~/.dropbox. Delete all the files within.
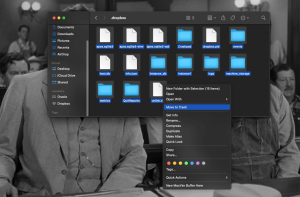
E. Empty the Trash Once More:
To ensure complete removal, empty your Trash again.
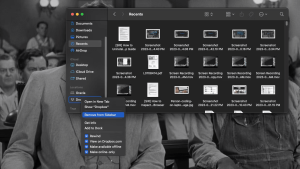
Bidding Farewell to Dropbox Finder Extensions
Let’s tie up any loose ends by removing any Dropbox remnants:

A. Removing Dropbox from Locations:
In Finder, find Dropbox under “Locations” in the sidebar. Control-click and select “Remove from Sidebar.”
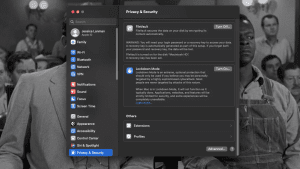
B. Erasing Dropbox as a Share Option:
Open System Settings, go to Privacy & Security, then Extensions. Under Others, click Sharing. Uncheck the box beside Dropbox Transfer.
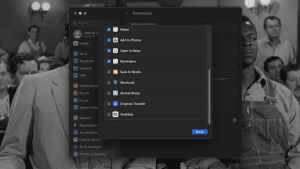
A Final Goodbye to Dropbox on Your Mac
Congratulations, you’ve successfully untangled your Mac from Dropbox’s grasp. Whether you’re embracing a new cloud service or simply decluttering, your Mac is now free. Thanks to Jessica Lanman’s step-by-step guide, you’ve navigated this process with ease.
Conclusion:
Embrace change without hesitation. Jessica Lanman’s expertise empowers you to remove Dropbox from your Mac effortlessly. The clutter-free space and seamless transition await—all you need is a little guidance.


