


Introduction to Windows File History:
Windows File History is a powerful built-in tool introduced in Windows 8 and continued in Windows 10. It enables users to recover accidentally deleted files and restore previous versions of documents easily. Similar to Apple’s Time Machine, File History serves as a reliable data backup and recovery solution for Windows users.
What is Windows File History?
- Understand the purpose and benefits of using File History.
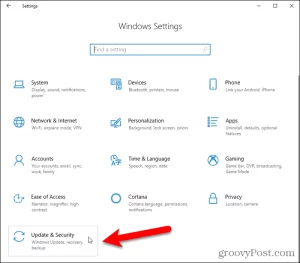
Image by https://www.groovypost.com/ - Discover its similarities and differences with other backup solutions.
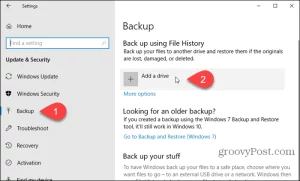
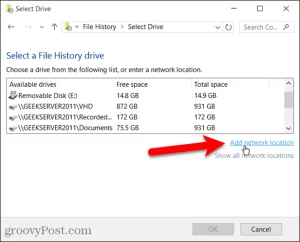
Image by https://www.groovypost.com/ A list of available drives displays on the left. Click the one you want to use.
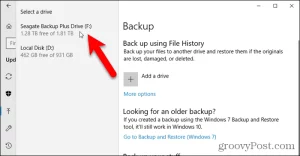
Image by https://www.groovypost.com/
Setting Up File History:
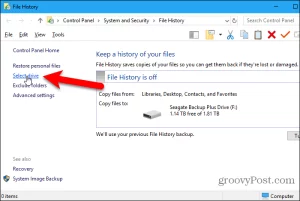
Enabling File History and Selecting Backup Drive:
- Access PC Settings from the Start menu and navigate to “Update & Security.”
- Click on “Backup” in the left pane and then “Add a drive” to select the backup drive.
Configuring File History Options:
- Adjust the backup frequency and retention period for file versions.
- Customize folders to be included or excluded from the backup process.
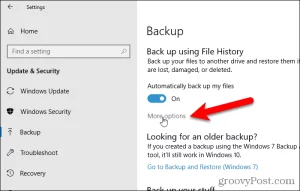
Image by https://www.groovypost.com/ The Backup options screen allows you to set how often File History backs up your files and how long versions are saved. Select options from the Back up my files and Keep my backups drop-down lists.
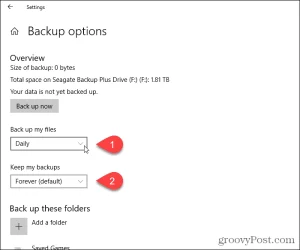
Image by https://www.groovypost.com/ File History automatically adds certain folders to the backup. So before you begin the backup process, you can remove folders you don’t want to back up.
Under Back up these folders, select a folder you don’t want to back up and click Remove. Repeat for each folder you want to remove.
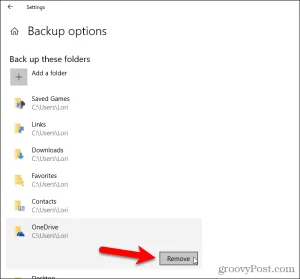
Image by https://www.groovypost.com/ You can also specifically exclude folders. So, for example, if there’s a subfolder in one of the folders being backed up that you don’t want to back up, you can exclude that subfolder.
Under Exclude these folders, click Add a folder. Next, select a folder to exclude on the Select Folder dialog box and click Choose this folder.
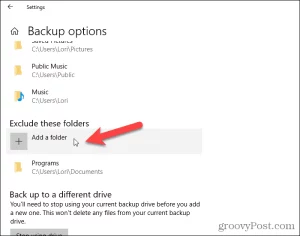
Image by https://www.groovypost.com/ When you ready to start the backup process, click Back up now under Overview.
You’ll see a message saying File History is backing up your data. But, unfortunately, there is no estimated time listed. So the initial backup may take a while.

Image by https://www.groovypost.com/
Back-Up to a Network Location
As we mentioned previously, you can use a network location for your backup as well. For example, maybe you have a home server or network-attached storage (NAS) box that you want to use.
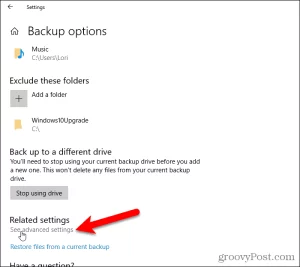
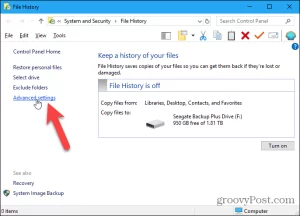
Go to the Backup options screen, if you’re not already on it, and click See advanced settings under Related settings.
Click Select drive in the right panel on the File History screen in the Control Panel.
On the Select a File History drive screen, you’ll see local and network drives listed. If you don’t see the network drive, you want to use, click Add a network location and select it.
Recover Files Using PC Settings
Suppose you need to recover a file or directory stored on a local drive (not cloud storage), open PC Settings, and go to Update & Security > Backup. Then, click More options.
On the Backup options screen, click Restore files from a current backup under Related Settings.
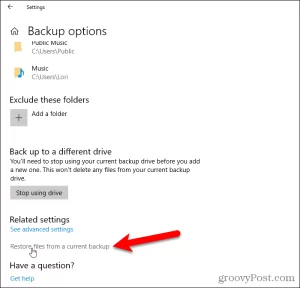
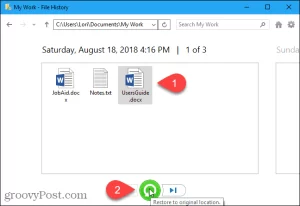
Navigate to the file you want to restore and use the arrow buttons to select a version of the file to restore.
Then, click the green Restore button.
Recover Files Using File Explorer
Or you can use File Explorer to restore a previous version of a file.
Open up File Explorer and select the file you want to restore a version of. Then, click History on the Home tab.

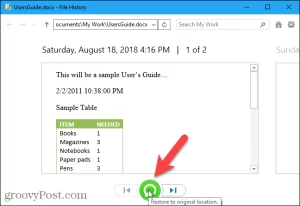
Again, you can go back in time using the arrow buttons and select a different version of the files to restore.
Click the green restore button to restore the selected version.
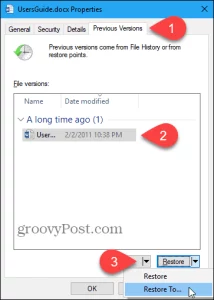
Or, you can right-click a file and select Properties. Then, click the Previous Versions tab and select the version of the file you need. This is a good way to grab an individual document you made changes to but want to work with a previous draft instead.
Click Restore to restore the version of the file to the original location. If you want to restore the file to a different location, click the down arrow on the Restore button and select Restore To.
On the Restore to dialog box, navigate to the folder where you want to restore the selected version of the file and click Select Folder. If the file already exists in that location, you’ll be asked if you want to replace the file.
Clean Up File History
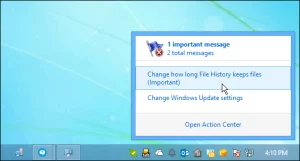
After a while, depending on the drive size and your configured settings, you might get a notification that you need to free up space on your File History drive.
If you get that message, go to PC Settings > Update & Security > Backup > More options > See advanced settings. Then, click Advanced settings on the left.
On the Advanced settings screen, click Clean up versions.

Conclusion:
By mastering Windows File History, you can ensure the safety of your valuable data and easily recover deleted files and previous document versions. Regularly back up your files to avoid data loss, and take advantage of File History’s powerful recovery capabilities. With this guide, you’ll be equipped to safeguard your files and streamline the recovery process, making File History an essential part of your data backup and recovery routine.